Overview
This is a guide to set up IPython Notebook on a Server - specifically, on a DigitalOcean VPS. This will allow you to access your iPython Notebooks from anywhere.
Overview of Steps:
- Set up a domain name
- Get a VPS
- Install IPython Notebook (and all dependencies)
- Configure IPython Notebook to run in a server mode
- Add SSL
- Make IPython Notebook start automatically
Create a domain
Go to http://freedns.afraid.org and click "Setup an account here" Go through the signup form Click on the activation link they send to your email This will bring you back to their site; Click the link you see there called "Add a subdomain" Here is how I filled out the form:
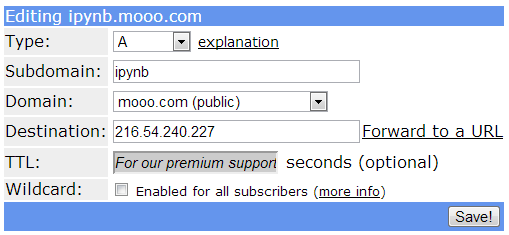
Notes:
- Leave the Destination alone for now, and leave the page open, as we will come back and change the destination in a minute.
- You the domain name you select may be taken; if so, just click on the "Subdomains" link and try a different name.
Get a VPS (Virtual Private Server)
For the tutorial, I'm using Digital Ocean, since it is what I use personally. It is only $5/month for an SSD-based VPS (as of August 2013).
Create an account on Digital Ocean, including putting in a credit card
Go to the Droplets tab and hit the button: "Create Droplet" ("Droplet" is how DigitalOcean refers to their VPSs):

Enter the hostname as the domain name you just set up above
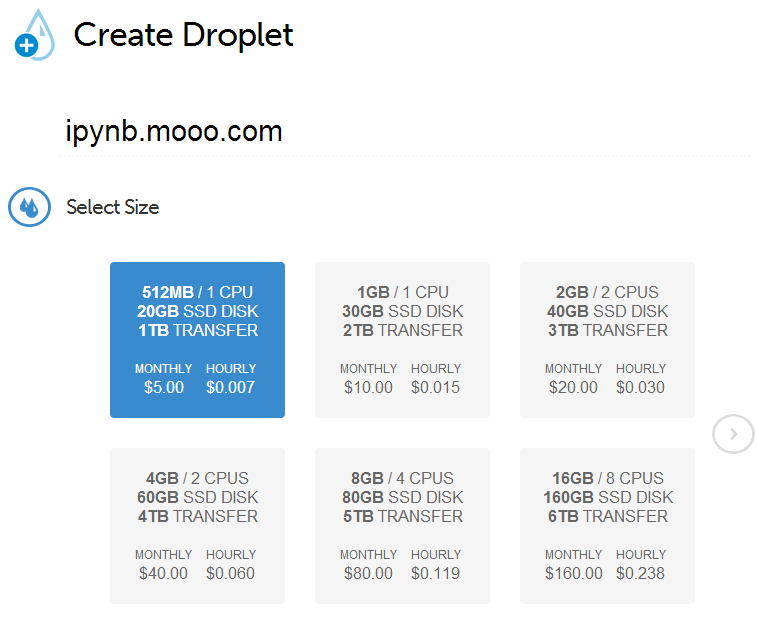
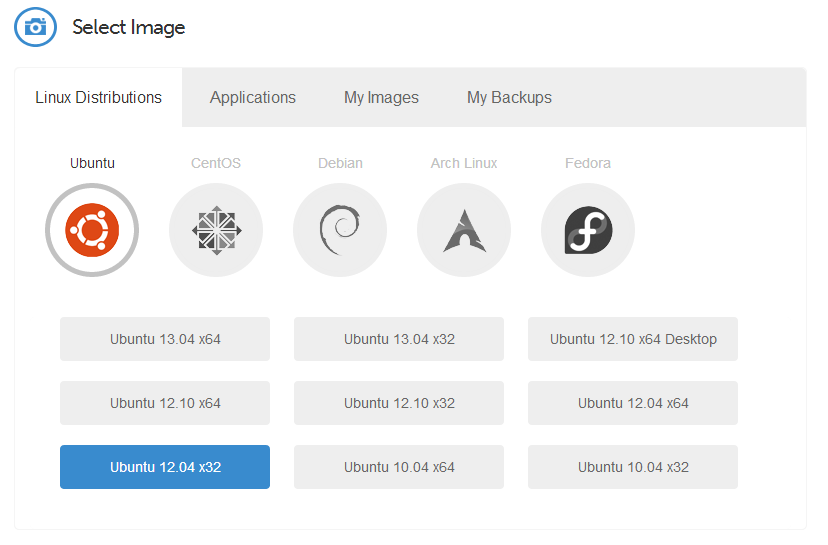
Make sure you have Ubuntu 12.04 x32 selected. You should be able to keep all the other default settings.
Click "Create Droplet" and then wait for it to be created. When it is done, you should see a screen like this:
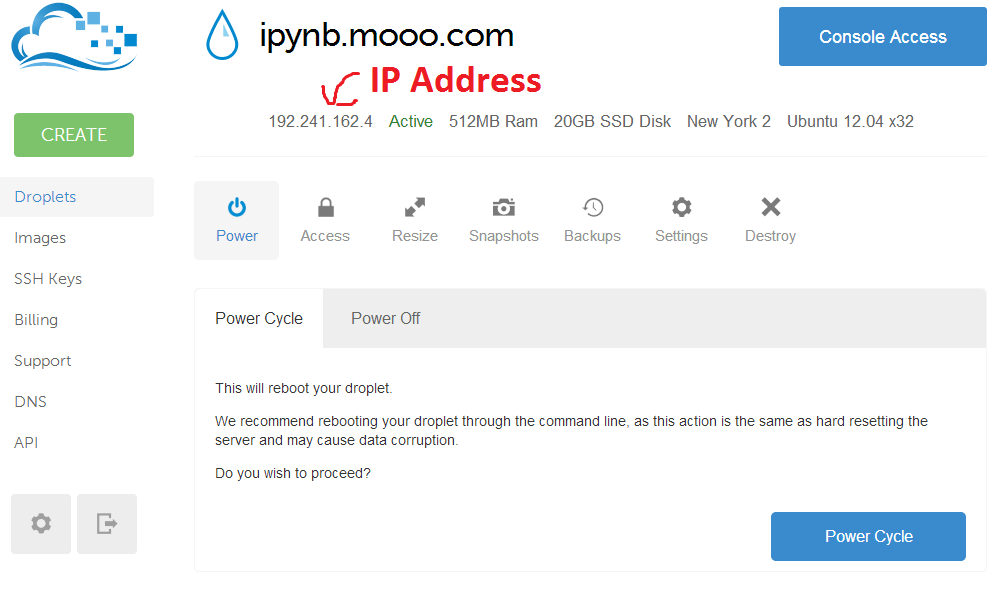
Make a note of the IP Address
You will also receive an email that gives you the password for the root user on this Droplet (VPS). When you get that email, you will have all the information you need to log in to the new VPS:
IP: 192.241.162.4 (in my case)
Username: root
Password: mysecretpassword
If you are on mac or linux, you can just type the command:
ssh root@192.241.162.4 # (of course, with your Droplet's IP Address)
If you are on windows, you can use Putty.
Once you are logged in, you should see a prompt that looks something like this:
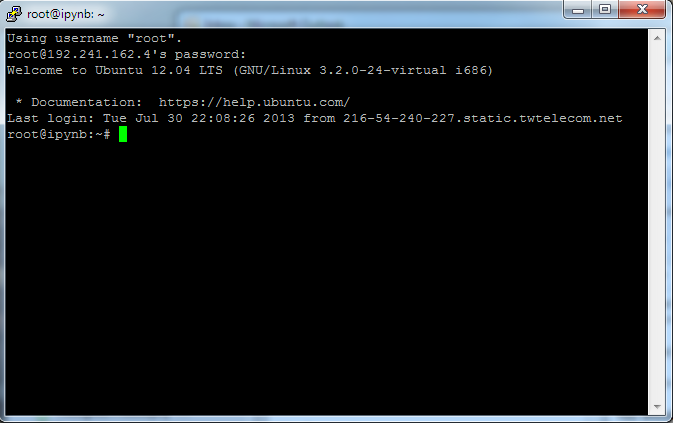
I recommend changing your password. To do this, just type passwd, and it will prompt you for a new password. If you do this, then you will login with that password from then on (instead of the one that was emailed to you).
Set domain to point to this server
Now that you can login, let's set up DNS to point your domain name to this server.
Go back into the freedns.afraid.org, and click on the domain link, and change the Destination to the IP Address of your Server/Droplet/VPS.
Now you may have to wait for a few minutes (or hours) before you are able to access your server by this name, and you can move on to the other steps without this, but here is how you see if it is ready:
Do this on a command-line (Terminal if on mac, cmd in windows, if you're on linux, then you know it :) ).
ping ipynb.mooo.com # (or whatever your domain is).
You will know if the DNS change has propagated to you if you see your server's IP address in there. When I first tried it, the IP was still out of date:

Install IPython Notebook and its dependencies
apt-get update # To update the repository
apt-get install python-pip python-virtualenv python-numpy python-scipy
pip install tornado pyzmq ipython
Create an SSL Certificate
You will need an SSL Certificate below; to create it, enter the command below, and set the prompts as see fit to you:
openssl req -x509 -nodes -newkey rsa:1024 -keyout ipython_cert.pem -out ipython_cert.pem
It should ask you a few questions, and look something like this:
Generating a 1024 bit RSA private key
.............++++++
......................................++++++
writing new private key to 'ipython_cert.pem'
-----
You are about to be asked to enter information that will be incorporated
into your certificate request.
What you are about to enter is what is called a Distinguished Name or a DN.
There are quite a few fields but you can leave some blank
For some fields there will be a default value,
If you enter '.', the field will be left blank.
-----
Country Name (2 letter code) [AU]:US
State or Province Name (full name) [Some-State]:Wisconsin
Locality Name (eg, city) []:Milwaukee
Organization Name (eg, company) [Internet Widgits Pty Ltd]:CalebMadrigal
Organizational Unit Name (eg, section) []:
Common Name (e.g. server FQDN or YOUR name) []:Caleb
Email Address []:caleb.madrigal@gmail.com
Move the certificate to the .ssl directory:
mkdir /root/.ssl
mv ipython_cert.pem /root/.ssl
Create a password hash
You will need a password to protect you IPython Notebook from other people. So choose a password, and then follow these steps to get the hash of the password (which you will use below).
On the command-line, run:
ipython
And type in the following (and enter your desired password at the "Enter password" prompt):
In [1]: from IPython.lib import passwd
In [2]: passwd()
Enter password:
Verify password:
Out[4]: 'sha1:1219a393391f:5e453a30e31c69641678aba65e2e91aeadeb1068'
That output string, 'sha1:1219a393391f:5e453a30e31c6...' is your hash. Save it, as you will use it below.
Configure IPython Notebook
Create a directory to hold your IPython Notebook files (*.ipynb)
cd /root
mkdir pynb
Create a IPython Notebook profile
ipython profile create nbserver
Edit the config file for IPython notebook for the newly created profile; NOTE: you can use nano place of vim if you don't know vim.
vim /root/.ipython/profile_nbserver/ipython_notebook_config.py
Add the following lines to the top:
c = get_config()
c.IPKernalApp.pylab = 'inline'
c.NotebookApp.certfile = u'/root/.ssl/ipython_cert.pem'
c.NotebookApp.ip = '*'
c.NotebookApp.open_browser = False
c.NotebookApp.password = u'REPLACE ME'
c.NotebookApp.port = 4096
c.NotebookManager.notebook_dir = u'/root/pynb'
Make sure to replace the 'REPLACE ME' string with the password hash which you generated above
Now, to run IPython Notebook with all of these settings, you this command:
ipython notebook --profile nbserver --pylab inline
And finally, you should be able to access your IPython Notebook server from anywhere from a URL like this (but with your own hostname instead of mine): https://ipython.mooo.com:4096/
And it should look like this:
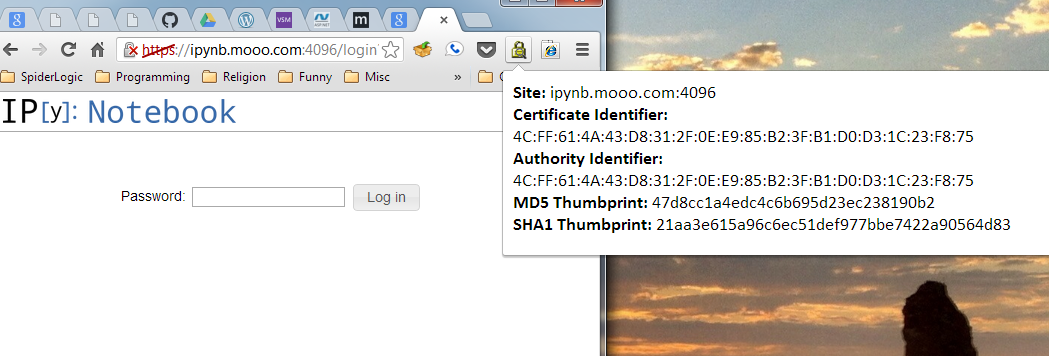
How to check that your certificate is correct
Since you are not using a certificate signed by a certificate authority, you will need to be able to verify that the certificate is correct when you go to the IPython Notebook site. To do this, I recommend downloading the Chrome extension put out by https://www.signaturecheck.org/. Just Google for "Google Chrome Signature Check"
You can see me using it in the image above. Just memorize at least some of the digits in the MD5 or SHA1 Thumbprint. Else, you can write them down somewhere. It's okay if someone finds them; these numbers are meant to be public.
Set up IPython Notebook to start automatically
So that you don't have to log in to SSH to get IPython Notebook running, you can set up supervisord to start it for you:
Find the path of ipython:
root@ipynb:~# which ipython
/usr/local/bin/ipython
Add this line to the file: /etc/rc.local
/usr/local/bin/ipython notebook --profile nbserver --pylab inline
Now you should be able to reboot, and you should be able to access your IPython Notebook as before. So at this point, even if the server reboots, iPython Notebook will be started again.
To test this, type reboot into the command-line. This will boot you out of SSH, but you should be able to reconnect in a minute or 2. After the server has had time to reboot, you should see if you can access your IPython Notebook server (as done above). If so, everything is working.
Final Notes
- Remember to always check the SSL signature before typing your passoword in. If you don't, then it is possible that there is a Man-in-the-Middle attack going on, and someone evil could see your password
- You are typically encouraged not to run things with root, but if IPython Notebook is all you are using this VPS for, then it should be fine.
- You are typically encouraged to run python stuff in a virtualenv. That is typically good, but for simplicity, I didn't include it in this tutorial.
- For now, you cannot organize IPython Notebooks in subdirectories (and access them all with a single running instance of iPython Notebook). But that should be coming in the future: https://github.com/ipython/ipython/wiki/IPEP-16%3A-Notebook-multi-directory-dashboard-and-URL-mapping